Creating A New IAC Project With HACHICORP's CDK FOR tERRAFORM WITH TYPESCRIPT

Hachicorp Terraform

WHAT'S TERRAFORM?

Hachicorp’s Terraform is an open-source infrastructure as a code software tool that provides a CLI workflow to manage hundreds of cloud services. In addition, it has a modular structure, with which you can manage multi-cloud infrastructures with a single code-base.

What is CDK for Terraform?

Terraform CDK is a tool developed by Hachicorp and AWS developers which allows you to write your infrastructure in your favourite language

Although it’s still in active development, CDK for Terraform currently supports :

  • TypeScript
  • Python
  • C#
  • Go(Beta)
  • Java

CDK for Terraform uses the very programming constructs that AWS CDK implemented. Yet, instead of using CloudFormation YAML output, it uses Terraform as a runtime engine, and the output would be terraform’s JSON configuration that terraform can understand.

Setting Up the Terraform CDK Project With Typescript

Prerequisites

  • It is necessary to have Terraform installed for cdktf to work. You can download the latest version from the official Terraform Downloads page.
  • Node.js
  • A preferred package manager: NPM or YARN

Creating the CDK Project With Typescript:

Once we have installed the prerequisites, we can start setting up the project by installing CDK for Terraform CLI using our preferred package manager, either npm or yarn.
				
					npm install -g cdktf-cli


					/usr/local/bin/cdktf -> /usr/local/lib/node_modules/cdktf-cli/bin/cdktf+ cdktf-cli@0.2.0
updated 3 packages in 13.34s
				
			
Create a new empty project directory, After installing cdktf-cli globally.
				
					mkdir cdk-terraform-tutorial
cd cdk-terraform-tutorial/


From the project directory, initialize the CDK for Terraform project by giving the language as a template argument.

For a typescript template :

cdktf init –template=typescript 

As you can see, CDK for Terraform currently supports five programming languages. So this will initialize the CDK for Terraform Project project, using the chosen language and template. ​
				
					cdktf init --template=typescript


					Welcome to CDK for Terraform!

By default, cdktf allows you to manage the state of your stacks using Terraform Cloud for free.
cdktf will request an API token for app.terraform.io using your browser.

If login is successful, cdktf will store the token in plain text in
the following file for use by subsequent Terraform commands:
    /home/fatih/.terraform.d/credentials.tfrc.json

Note: The local storage mode isn't recommended for storing the state of your stacks.

? Do you want to continue with Terraform Cloud remote state management? No
? Project Name cdk-terraform-tutorial
? Project Description A simple getting started project for cdktf.

added 2 packages, and audited 54 packages in 2s

5 packages are looking for funding
  run `npm fund` for details

found 0 vulnerabilities

added 352 packages, and audited 406 packages in 14s

32 packages are looking for funding
  run `npm fund` for details

found 0 vulnerabilities
========================================================================================================


Initially, it asks if we want to store the infrastructure state in terraform Cloud for Free. Let’s use the local storage to store terraform states, as we will be managing the state from a single host.

Note: The local storage mode isn’t recommended for storing the state of your stacks. Thus Storing the infrastructure state in a central location is highly advised for multi-machine environments.


It should additionally print a list of helpful commands that you can use to manage your CDK-terraform project,

				
					========================================================================================================

  Your cdktf typescript project is ready!

  cat help                Print this message

  Compile:
    npm run get           Import/update Terraform providers and modules (you should check-in this directory)
    npm run compile       Compile typescript code to javascript (or "npm run watch")
    npm run watch         Watch for changes and compile typescript in the background
    npm run build         Compile typescript

  Synthesize:
    cdktf synth [stack]   Synthesize Terraform resources from stacks to cdktf.out/ (ready for 'terraform apply')

  Diff:
    cdktf diff [stack]    Perform a diff (terraform plan) for the given stack

  Deploy:
    cdktf deploy [stack]  Deploy the given stack

  Destroy:
    cdktf destroy [stack] Destroy the stack

  Test:
    npm run test        Runs unit tests (edit __tests__/main-test.ts to add your own tests)
    npm run test:watch  Watches the tests and reruns them on change

  Upgrades:
    npm run upgrade        Upgrade cdktf modules to latest version
    npm run upgrade:next   Upgrade cdktf modules to latest "@next" version (last commit)

 Use Prebuilt Providers:

  You can find all prebuilt providers on npm: https://www.npmjs.com/search?q=keywords:cdktf
  You can install these providers through npm:

  npm install @cdktf/provider-aws
  npm install @cdktf/provider-google
  npm install @cdktf/provider-azurerm
  npm install @cdktf/provider-docker
  npm install @cdktf/provider-github
  npm install @cdktf/provider-null

  You can also build any module or provider locally. Learn more https://cdk.tf/modules-and-providers

========================================================================================================


It might be helpful to copy those commands in your README.md file to keep track of everything for later usage. It’s a shame a cdktf does not create a README.md that already stores those commands.

CONFIGURING THE TERRAFORM PROVIDERS AND ADDITIONAL MODULES

Now let’s open the above project in your favourite IDE. We will be using Jetbrains Webstorm here. First, open a new project via Webstorm, pointing to the created project folder. The initial folder structure should be as below.

CDK for Terraform Initial Folder Structure

You can see some code is already present, and there is a “terraformProviders” configuration option in cdktf.json, where we can add our cloud providers and modules according to the cloud provider we are going to use. Open up the cdktf.json and add the preferred provider configurations to configure it for the AWS/GCP/Azure Terraform provider.

And the cdktf.json should be seen as below.

				
					{
  "language": "typescript",
  "app": "npx ts-node main.ts",
  "projectId": "eed84344-9709-4a87-8d3a-12e4211d1bca",
  "terraformProviders": [
    "aws@~> 4.0"
  ],
  "terraformModules": [],
  "context": {
    "excludeStackIdFromLogicalIds": "true",
    "allowSepCharsInLogicalIds": "true"
  }
}


Terraform Providers

Terraform relies on plugins called “providers” to interact with resources. Provider plugins act as a translation layer that allows Terraform to communicate with many different cloud providers, databases, and services.

Terraform configurations must declare which providers they require so that Terraform can install and use them. Additionally, some providers need a few configuration management (like endpoint URLs or cloud regions) before we can use them.

  •  “aws@~> 4.0”
  • “azurerm@~> 3.0”
  • “google@~> 4.0”
  • “kubernetes@~> 2.0”
In addition, you can access many providers, and modules from official terraform providers page.
 

Run the `cdktf get` command to generate the CDK Constructs for the CDK-for-terraform project.

				
					npm run get


> cdk-terraform-tutorial@1.0.0 get
> cdktf get

Generated typescript constructs in the output directory: .gen


You should see the generated provider CDK constructs under the .gen folder after running the `npm run get` command.


cdk for terraform tutorial with typescript folder structure after running npm run get with samplle providers

Optional Step - Using pre-build providers

It might be a bit slow to generate the code bindings for providers, which might take multiple minutes with very large schemas. Thus, terraform offers several popular providers as pre-built packages. Pre-built providers are entirely optional for performance, and you may prefer to generate the code bindings for those providers yourself. The Terraform CDK Providers page has a complete list of available pre-built providers.


You can install those providers by running one of the commands mentioned in the output of the `cdktf init` command as the ones below.

				
					  npm install @cdktf/provider-aws


					  npm install @cdktf/provider-google


					  npm install @cdktf/provider-azurerm


					  npm install @cdktf/provider-docker


					  npm install @cdktf/provider-github


					  npm install @cdktf/provider-null


Defining Terraform Resources to be created

Resources are the most crucial element when defining infrastructure in CDKTF applications. Each resource describes infrastructure objects, such as virtual networks, compute instances, or higher-level components such as DNS records.

Resource definitions and properties vary depending on the resource type and the provider. Therefore, you need to consult the provider’s documentation for a complete list of available resources and configuration options.

We need to start coding our resources in the main.ts file, generated by the ‘cdktf init’ command.

First, we need to import and define the Providers in the beginning block of main.ts, just after the super command.

And the final main.ts should be something like below, depending on the resources you need to create.

				
					 new AwsProvider(this, "aws", {
      region: "us-east-1",
    });


And the final main.ts should be something like below, depending on the resources you need to create.


					import { Construct } from "constructs";
import { App, TerraformStack } from "cdktf";
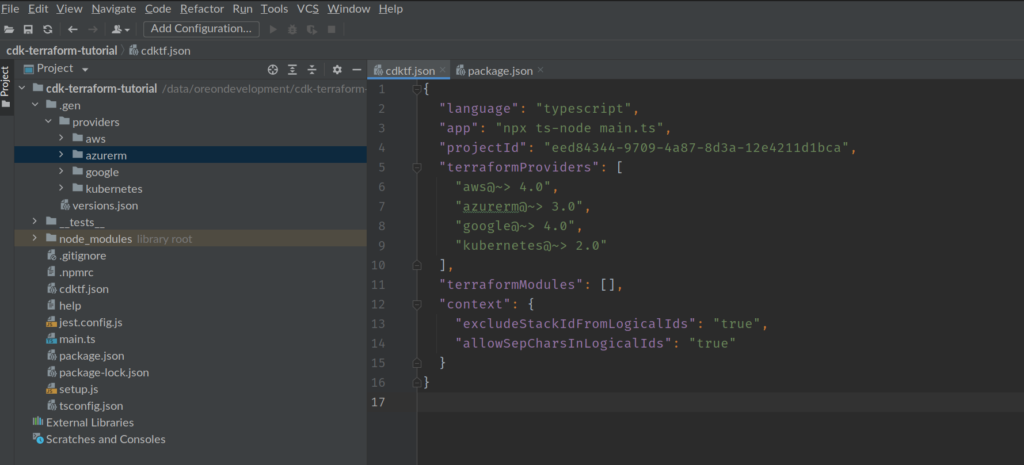
import {AwsProvider, EC2,S3Bucket,SnsTopic} from ".gen/providers/aws";


class MyStack extends TerraformStack {
  constructor(scope: Construct, name: string) {
    super(scope, name);

    // define resources here
    new AwsProvider(this, "aws", {
      region: "us-east-1",
    });

    new EC2.Instance(this, "my-ec2-instance", {
      ami: "ami-2757f631",
      instanceType: "t2.micro",
    });

     new S3Bucket(this, name, {
      bucket: name,
      tags: [],
    });

    new SnsTopic(this, "Topic", {
      displayName: "my-sns-topic",
    });

  }
}

const app = new App();
new MyStack(app, "cdk-terraform-tutorial-typescript");
app.synth();


The source files for the  CDK Terraform Tutorial with Typescript can be accessed via the project’s github repository.


DEPLOYING ThE TERRAFORM CDK STACK

cdktf synth

  • Synthesizes Terraform code for the given app in a directory.
  • This command creates tfstate file, which will store the state of our stack and will check and diff with the infrastructure already created.
  • This command will create a folder called cdktf.out which contains all Terraform JSON configuration that was generated.
				
					cdktf synth 


cdktf deploy

  • Deploy and create infra in the specified provider
  • While running the above command, tfstate.lock file will be created in the current directory, as we chose to have a local backend while setting up the project.
				
					cdktf deploy 


cdktf destroy

  • Destroys the created stack.
				
					cdktf destroy 


The source files for the  CDK Terraform Tutorial with Typescript can be accessed via the project’s github repository.